Google Analytics is a powerful tool that allows website owners and marketers to track and analyze their website's performance. With the help of Google Analytics, you can gain valuable insights into your website's traffic, user behavior, and conversions. One of the best ways to visualize and understand this data is by creating a Google Metrics Dashboard.
Step 1: Set Up Google Analytics
The first step in creating a Google Metrics Dashboard is to set up Google Analytics for your website. If you haven't done so already, you will need to create a Google Analytics account and add the tracking code to your website. Once you have set up Google Analytics, it will start collecting data about your website's performance. If you want to know more about the Google metric dashboard you may visit http://agencydashboard.io/.
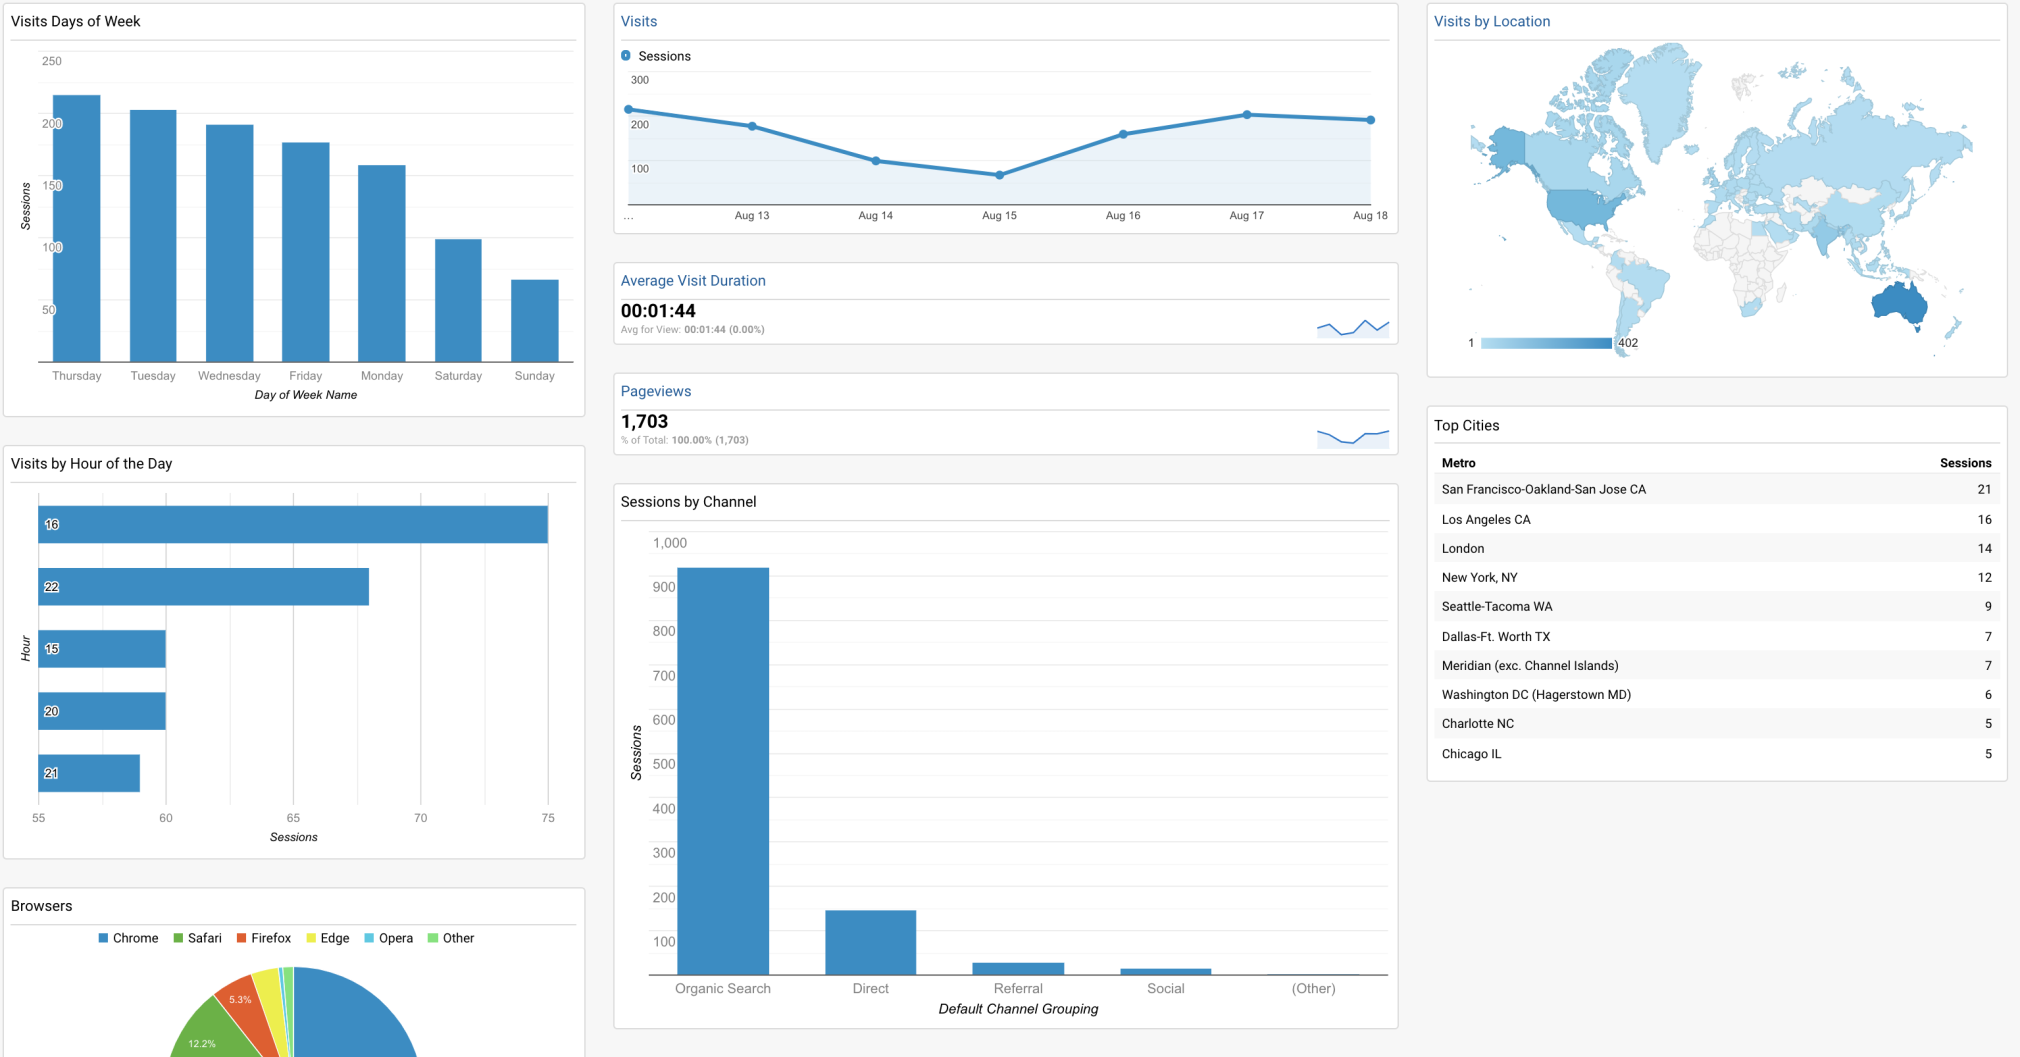
Image Source: Google
Step 2: Define Your Goals and KPIs
Before you start creating your Google Metrics Dashboard, it's important to define your goals and key performance indicators (KPIs). What do you want to achieve with your website? Are you looking to increase traffic, improve conversions, or boost engagement? By defining your goals and KPIs, you can focus on the metrics that matter most to your business.
Step 3: Identify the Metrics to Track
Once you have defined your goals and KPIs, the next step is to identify the metrics you need to track to measure your progress. Google Analytics offers a wide range of metrics, including traffic sources, user behavior, conversion rates, and more. Consider the metrics that align with your goals and KPIs, and make a list of the ones you want to include in your dashboard.
Step 4: Choose a Dashboard Platform
There are several dashboard platforms available that can help you create a Google Metrics Dashboard. Some popular options include Google Data Studio, Klipfolio, and Databox. These platforms allow you to connect your Google Analytics account and visualize your data in a user-friendly way. Choose a platform that best suits your needs and budget.